Skyline Trail - The Ultimate Circumnavigation of Mount Rainier
The Skyline Trail is a monumental thru-hiking achievement, offering a complete 154.5-kilometre circumnavigation of Mount Rainier (Tahoma), the most glaciated peak in the contiguous United States. This is not merely a walk; it is a profound physical and spiritual engagement with a massive active stratovolcano that rises to 4,392 metres. The route is defined by its relentless verticality, featuring a staggering 13,716 metres of cumulative elevation gain—a figure that challenges even the most seasoned mountain athletes. Traversing through every life zone found in the Pacific Northwest, from ancient lowland Douglas fir forests to high alpine tundra and glacial moraines, the Skyline Trail provides an unparalleled perspective on the raw power of geological forces and the delicate beauty of subalpine ecosystems.
- Distance: 154.5 km (full circuit)
- Duration: 10–14 days
- Elevation Gain: 13,716 m
- Difficulty: Very Challenging
- Best Time: July to September (snow-free window)
- Highest Point: Panhandle Gap (2,073 m)
- Closest City: Ashford, Washington
- Permits: Mandatory for all overnight stays; high demand via lottery system
Overview
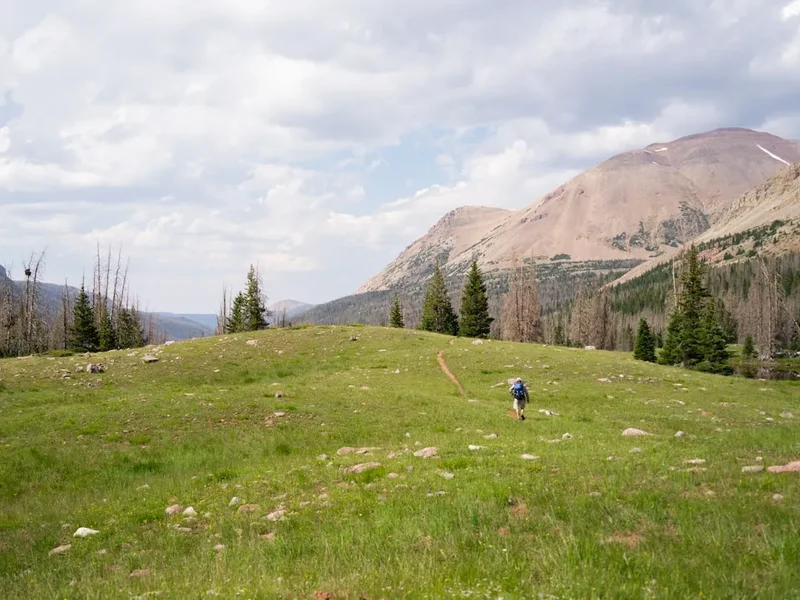
The Skyline Trail is widely regarded as one of the most strenuous and rewarding long-distance treks in North America. Unlike many mountain trails that follow valleys or ridges, the Skyline Trail is a series of "teeth" on a saw blade; it crosses every major drainage radiating from the central hub of Mount Rainier. This means that a typical day involves descending 1,000 metres into a river valley, crossing a glacial torrent, and immediately ascending 1,000 metres to the next ridge. This pattern repeats dozens of times over the 154.5-kilometre journey, testing the endurance of the legs and the resilience of the mind.
The landscape is dominated by the presence of the mountain itself. Mount Rainier is so massive that it creates its own weather systems, and its 25 named glaciers form the largest collection of permanent ice on a single peak in the lower 48 states. Walkers will witness the birth of rivers at the snouts of these glaciers, where the ice turns to milky, silt-laden water that thunders through deep canyons. In contrast to the raw power of the ice, the trail passes through "parks"—vast subalpine meadows that, in August, erupt in a kaleidoscopic display of wildflowers. Lupine, Indian paintbrush, avalanche lilies, and heather create carpets of colour that seem almost surreal against the backdrop of the white, jagged peak.
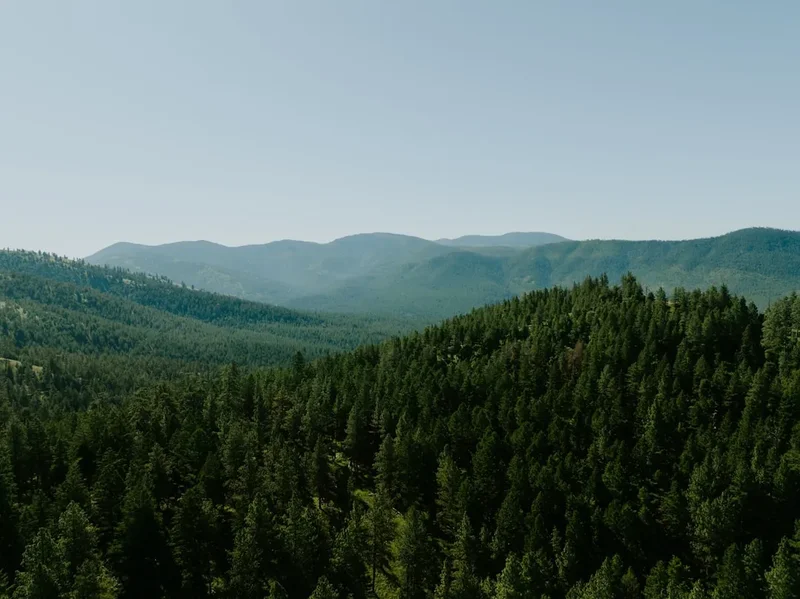
The trail is also a journey through time. In the lower elevations, walkers move through old-growth forests where trees have stood for over 800 years. These cathedrals of cedar and hemlock provide a cool, damp sanctuary, draped in moss and ferns. As the trail climbs, the forest thins into the "Krummholz" zone, where trees are stunted and twisted by the wind and snow, eventually giving way to the stark, volcanic beauty of the high alpine. The Skyline Trail is a masterclass in biodiversity, offering sightings of marmots, pikas, mountain goats, and the occasional black bear or elk, all within a landscape that feels both ancient and constantly in flux.
History and Cultural Context
The land surrounding Mount Rainier has been of profound spiritual and practical importance to Indigenous peoples for millennia. The Puyallup, Nisqually, Cowlitz, Yakama, and Muckleshoot tribes have deep ancestral connections to the mountain, which they call Tahoma or Tacoma. For these peoples, the mountain was a place for gathering berries, hunting, and seeking spiritual visions. The high meadows were seasonal homes, and the mountain itself was often viewed as a deity or a source of life-giving water. Modern walkers are encouraged to recognise that they are travelling through a landscape that remains sacred to these communities.
The concept of a trail encircling the mountain began to take shape shortly after the establishment of Mount Rainier National Park in 1899—the fifth national park in the United States. Early explorers and park rangers began connecting existing Indigenous paths and sheep-herder trails to create a patrol route. By 1915, a rough circuit had been established, though it was far from the well-maintained path seen today. The trail was originally used by rangers on horseback to monitor the park's boundaries and protect against illegal hunting and timber harvesting.
During the 1930s, the Civilian Conservation Corps (CCC) played a pivotal role in formalising the route. These young men built many of the stone steps, bridges, and shelters that are still in use today, using local materials to ensure the structures blended into the natural environment. The trail was officially named in the mid-20th century, and its reputation grew as the "Golden Age" of American hiking took hold in the 1960s and 70s. Today, the Skyline Trail is managed with a focus on "Wilderness" designation, meaning that human impact is minimised, and the trail is maintained using traditional hand tools to preserve its rugged, historic character.
Want more background? Read extended notes on history and cultural context → Learn more
Seasonal Highlights and Weather Reality
The window for completing the Skyline Trail is remarkably short due to the massive snowfall Mount Rainier receives—often exceeding 15 metres in a single winter. The trail is typically only "melted out" and safe for standard hiking from mid-July through late September. Even in July, high passes like Panhandle Gap and the crossing of the Carbon Glacier can remain under several metres of snow, requiring navigation skills and traction devices.
July: This is the month of transition. The lower forests are lush, but the high country is a world of white. Snow bridges over streams can be dangerous, and the trail can be difficult to find. However, the sight of avalanche lilies poking through the receding snow is a highlight for early-season hikers. Mosquitoes are at their peak in July, particularly near the Golden Lakes and subalpine marshes.
August: Generally considered the "prime" month. The snow has mostly retreated from the trail, the wildflowers are in full bloom, and the weather is at its most stable. Daytime temperatures in the valleys can reach 25°C, while the high ridges remain a comfortable 15°C. This is also the busiest time on the trail, and competition for permits is at its highest.
September: A favourite for many experienced thru-hikers. The bugs have disappeared, the huckleberries are ripe for picking, and the vine maples turn a brilliant scarlet. The air is often crisper and clearer, providing the best views of the mountain. However, the days are shorter, and the first autumn storms can bring freezing rain or early snow to the high passes. By October, the trail begins its long winter sleep under the snowpack.
Recommended Itinerary
10-Day Skyline Thru-Hike Itinerary (Clockwise from Longmire)
Day 1: Longmire to Devil's Dream
- Distance: 11.5 km
- Elevation Gain: 850 m
- Time: 4–5 hours
- Start at the historic Longmire district (842 m)
- Steady climb through old-growth forest of Douglas fir and Western red cedar
- Pass the spectacular Rampart Ridge with views of the Nisqually Valley
- Arrive at Devil's Dream camp, nestled in a dense forest near a small stream
- A moderate first day to test pack weight and adjust to the elevation
Day 2: Devil's Dream to North Puyallup River
- Distance: 18.5 km
- Elevation Gain: 1,100 m
- Time: 7–9 hours
- Cross the stunning Indian Henry's Hunting Ground, famous for its historic ranger cabin and wildflower meadows
- Descend steeply into the Tahoma Creek drainage and cross the high suspension bridge
- Climb over Emerald Ridge for a close-up view of the Tahoma Glacier's icefall
- Descend to the North Puyallup River camp, located near a massive waterfall
Day 3: North Puyallup River to Golden Lakes
- Distance: 14.5 km
- Elevation Gain: 950 m
- Time: 6–7 hours
- A series of switchbacks leads out of the Puyallup canyon
- Traverse through the Sunset Park area, offering expansive views toward the Pacific Ocean
- Arrive at Golden Lakes, a series of alpine tarns that glow in the evening light
- Excellent opportunities for swimming (if you can brave the cold) and photography
Day 4: Golden Lakes to Mowich Lake
- Distance: 16 km
- Elevation Gain: 800 m
- Time: 6–8 hours
- Descend into the South Mowich River valley, a wide, braided glacial wash
- Challenging river crossing (check log bridge status)
- Long climb up to Mowich Lake, the largest and deepest lake in the park
- Mowich Lake is accessible by road, making it a popular spot for food caches
Day 5: Mowich Lake to Carbon River (via Spray Park)
- Distance: 13.5 km
- Elevation Gain: 750 m
- Time: 6–7 hours
- Take the "Spray Park" alternate route for superior scenery (weather permitting)
- Pass Spray Falls, a 100-metre veil of water
- Climb into the high alpine meadows of Spray Park, often filled with marmots
- Descend past the snout of the Carbon Glacier, the lowest-reaching glacier in the lower 48 states
- Arrive at Carbon River camp in the deep, rainforest-like valley
Day 6: Carbon River to Mystic Lake
- Distance: 12.5 km
- Elevation Gain: 1,050 m
- Time: 6–7 hours
- Cross the Carbon River suspension bridge
- A long, relentless climb up to Moraine Park, offering views of the glacier's lateral moraines
- Arrive at Mystic Lake, a serene alpine lake surrounded by peaks
- The lake is a perfect spot for a mid-trip "rest" afternoon
Day 7: Mystic Lake to Sunrise/White River
- Distance: 19 km
- Elevation Gain: 900 m
- Time: 8–10 hours
- Descend into the Winthrop Creek drainage, crossing beneath the Winthrop Glacier
- Climb to Granite Creek and then up to Skyscraper Pass
- Traverse the high, dry meadows of the Sunrise area, the highest point accessible by car
- Descend to White River Campground for the night
Day 8: White River to Summerland
- Distance: 11 km
- Elevation Gain: 700 m
- Time: 4–5 hours
- A shorter day to allow for recovery
- Climb through beautiful forest into the Summerland meadows
- Summerland is widely considered the most beautiful camp on the trail, with stone shelters and views of the Fryingpan Glacier
- Watch for mountain goats on the surrounding cliffs
Day 9: Summerland to Indian Bar
- Distance: 10.5 km
- Elevation Gain: 600 m
- Time: 5–6 hours
- The most spectacular alpine section of the trail
- Cross Panhandle Gap (2,073 m), the highest point on the Skyline Trail
- Navigate snowfields and rocky ridges with views of Mount Adams and Mount St. Helens
- Descend into the "amphitheatre" of Indian Bar, where the Ohanapecosh River begins in a series of waterfalls
Day 10: Indian Bar to Longmire
- Distance: 27.5 km
- Elevation Gain: 900 m
- Time: 10–12 hours
- A long final push to complete the circuit
- Climb out of Indian Bar to Cowlitz Divide, a long ridge with 360-degree views
- Descend steeply to Box Canyon, where the Muddy Fork of the Cowlitz River has carved a narrow slot
- Pass Reflection Lakes and Louise Lake
- Final descent past Narada Falls back to the Longmire trailhead
Planning and Bookings
Book Your Trip
Everything you need to plan your journey
Accommodation
Find places to stay near Ashford
Flights
Search flights to Ashford
Essential Preparation
The Skyline Trail requires meticulous planning, often starting six months in advance. The primary challenge is the permit system, but physical preparation is equally critical. Walkers should be in peak physical condition, capable of carrying a 15–20 kg pack over significant elevation changes for multiple consecutive days. Training should focus on hill climbing and descending to toughen the knees.
Logistically, Ashford is the primary base town. It offers gear shops, basic groceries, and several lodges. Most hikers fly into Seattle-Tacoma International Airport (SEA) and rent a car for the two-hour drive to the park. It is highly recommended to spend at least one night at elevation (e.g., in Ashford or Longmire) before starting the trek to begin acclimatisation.
Trail Accommodation
Accommodation on the Skyline Trail consists of designated wilderness campsites. There are no hotels or indoor lodges along the route itself, with the exception of the historic Longmire and Paradise areas at the start/finish.
Campsite Facilities:
- Designated tent pads (to protect vegetation)
- Pit toilets (bring your own toilet paper)
- Bear poles or bear lockers for food storage (mandatory use)
- A nearby water source (creek or lake; must be treated)
- No fires are permitted at any wilderness camps
Booking Requirements:
- Permits are required for all overnight stays in the backcountry
- The park uses a lottery system on Recreation.gov, typically opening in March
- Successful lottery winners get a window to book their specific itinerary
- Remaining permits are released for general booking in late April
- A small percentage of permits are held for "walk-up" hikers, available at ranger stations on a first-come, first-served basis (highly risky for a full circuit)
Required Gear
- Footwear: Sturdy, waterproof hiking boots with excellent traction. Trail runners are popular but require strong ankles for the rocky terrain.
- Navigation: A high-quality topographic map and compass are essential. GPS apps (like Gaia GPS) are useful but should not be the sole source of navigation.
- Shelter: A lightweight, 3-season backpacking tent capable of withstanding high winds and heavy rain.
- Sleep System: A sleeping bag rated to at least 0°C, as temperatures can drop below freezing even in August. An insulated sleeping pad is crucial.
- Clothing: A moisture-wicking layering system. Include a fleece or down mid-layer and a high-quality Gore-Tex rain jacket and trousers.
- Traction: Microspikes or similar traction devices are often necessary for crossing snowfields in July and early August.
What to Bring
- Food: High-calorie, lightweight meals for the duration of the trip. Many hikers cache food at Mowich Lake or Sunrise to reduce pack weight.
- Water Treatment: A reliable filter (e.g., Sawyer Squeeze) or chemical treatment (e.g., Aquamira). Glacial silt can clog filters quickly; bring a pre-filter or allow water to settle.
- Bear Safety: An approved bear canister is highly recommended, though most camps have bear poles. All scented items (toiletries, trash) must be stored.
- Sun Protection: High-SPF sunscreen, polarised sunglasses, and a wide-brimmed hat. The sun is intense at high altitudes and reflects off snowfields.
- First Aid: A comprehensive kit including blister care (Leukotape is excellent), anti-inflammatories, and any personal medications.
- Emergency: A Satellite Messenger (e.g., Garmin inReach) is strongly advised as mobile signal is non-existent in most valleys.
Permits
Securing a permit for the Skyline Trail is a competitive process. The National Park Service (NPS) limits the number of hikers at each campsite to prevent overcrowding and protect the fragile subalpine environment. For the best chance of success, you must participate in the early access lottery.
The Lottery Process:
- Late February: NPS announces the lottery dates.
- March: The lottery is open for applications on Recreation.gov. There is a non-refundable application fee (approx. US$6).
- Late March: Applicants are notified of their "award" status and given a specific date and time to log in and reserve their itinerary.
- April: Lottery winners book their trips. Flexibility is key; have several backup itineraries ready.
- Late April: The reservation system opens to the general public for any remaining spots.
Walk-up Permits: Approximately one-third of the total backcountry capacity is reserved for walk-up permits. These can be obtained at the Longmire, White River, or Carbon River Wilderness Information Centres. To secure a walk-up permit for a 10-day circuit, you should arrive at the ranger station at least 24 hours before your intended start date and be prepared to wait in line before the doors open at 7:30 AM.
Costs: Once a permit is secured, there is a flat "Wilderness Permit Fee" (currently US$20 per group). This is in addition to the National Park entrance fee (US$30 per vehicle or use an America the Beautiful Pass).
Other Activities in the Area
If you have extra time before or after your thru-hike, Mount Rainier National Park offers several other world-class experiences:
- Paradise Visitor Centre: Visit the historic Jackson Visitor Centre for exhibits on the park's geology and climbing history. The meadows here offer the most famous views of the mountain.
- Narada Falls: A short but steep walk leads to the base of this 57-metre waterfall, where the spray often creates rainbows in the afternoon sun.
- Grove of the Patriarchs: An easy 2.4-km walk to an island in the Ohanapecosh River featuring massive, 1,000-year-old Western red cedars and Douglas firs.
- Mount Rainier Gondola: Located at the nearby Crystal Mountain Resort, this gondola takes you to 2,094 metres for a stunning "eye-level" view of the mountain and the Cascades.
- Ashford Basecamp: Enjoy a celebratory meal at the Copper Creek Inn (famous for blackberry pie) or visit the Whittaker Mountaineering shop to see historic climbing gear.
Safety and Conditions
River Crossings: This is the most significant objective hazard on the Skyline Trail. Glacial rivers like the White, Carbon, and Mowich are dynamic. Bridges are frequently washed out by "glacial outbursts" or heavy rain. If a bridge is out, do not attempt to ford a waist-deep, silty river. Wait for morning when flow is lowest, or backtrack. Always unbuckle your pack's waist belt when crossing water.
Weather Extremes: Mount Rainier creates its own weather. A sunny morning can turn into a freezing sleet storm by afternoon. Hypothermia is a genuine risk even in summer. Always carry a full set of waterproof layers and never hesitate to set up camp early if the weather turns dangerous.
Wildlife: Black bears and mountain lions (cougars) inhabit the park. While attacks are extremely rare, you must practice proper food storage. Never feed wildlife, including the "camp robber" jays or marmots. Feeding animals makes them aggressive and often leads to their removal by park staff.
Altitude: While the trail doesn't reach extreme altitudes, spending 10 days between 1,500 m and 2,100 m can affect those from sea level. Stay hydrated, eat plenty of salt and carbohydrates, and monitor for signs of altitude sickness (headache, nausea).
Snow Slopes: In early summer, the trail crosses steep snowfields. A slip without an ice axe or traction can result in a long, dangerous slide into rocks or trees. If you are uncomfortable with snow travel, wait until August to attempt the circuit.
Side Trips and Points of Interest
Tolmie Peak Lookout: A 3.5-km detour from the Mowich Lake area leads to one of the park's few remaining fire lookouts. The view from the top, looking across Eunice Lake toward the North Face of Rainier, is arguably the most iconic photograph in the park.
Spray Park: While technically an "alternate" route, Spray Park is so superior to the standard forest route that it is considered essential. The high alpine meadows and the massive Spray Falls are highlights of the entire 154.5-km journey.
The Carbon Glacier Snout: Take a moment to stand near the base of the Carbon Glacier. You can hear the ice cracking and the rocks grinding as the glacier moves. It is a visceral reminder that the mountain is a living, changing entity.
Panhandle Gap: Spend some extra time at the gap. On a clear day, you can see the entire Cascade Range, including Mount Adams, Mount St. Helens, and even Mount Hood in Oregon, over 150 kilometres to the south.
Leave No Trace
The Skyline Trail passes through some of the most fragile ecosystems on Earth. The subalpine meadows have a growing season of only a few weeks; a single footstep off-trail can crush plants that take years to recover. Adhering to Leave No Trace (LNT) principles is mandatory for the preservation of this wilderness.
Key LNT Practices for the Skyline Trail:
- Stay on the Trail: Never "cut" switchbacks. This causes massive erosion and destroys the trail's integrity.
- Camp Only in Designated Sites: Use the provided tent pads to prevent the expansion of campsites.
- Dispose of Waste Properly: Use the pit toilets provided at camps. If you must go between camps, dig a "cathole" 20 cm deep and at least 60 metres from water. Pack out all toilet paper.
- Respect Water Sources: Do not wash dishes or yourself directly in lakes or streams. Carry water 60 metres away and use biodegradable soap.
- Leave What You Find: Do not pick wildflowers or remove rocks or volcanic pumice.
- Minimise Campfire Impacts: Fires are prohibited. Use a lightweight stove for all cooking.