Mount Shasta Summit Trail - The Sentinel of Northern California
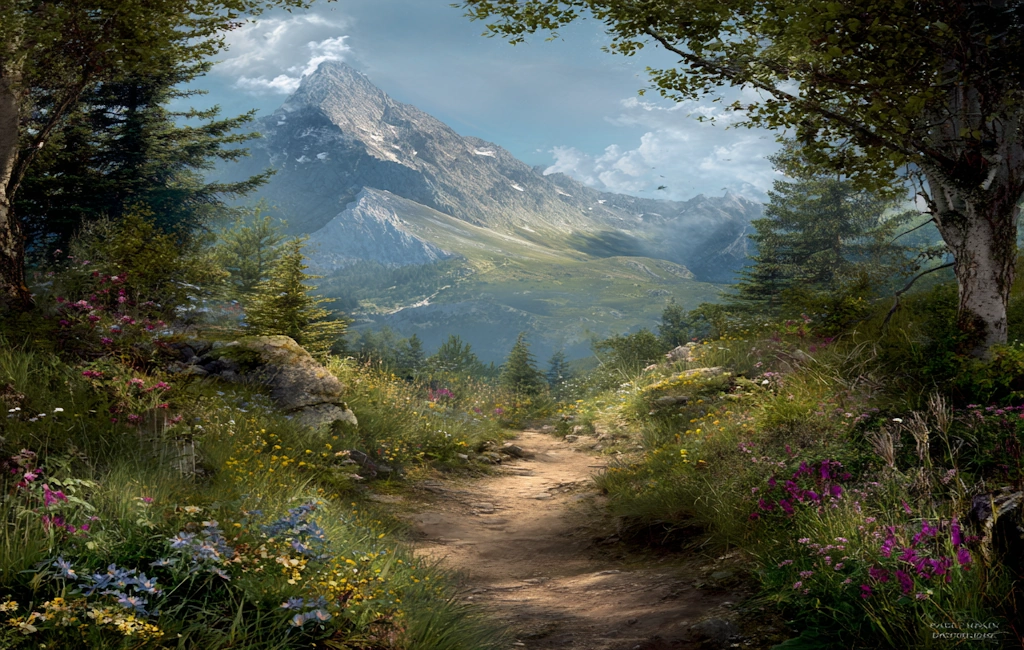
Mount Shasta is not merely a mountain; it is a colossal, snow-capped stratovolcano that dominates the horizon of Northern California with an almost spiritual presence. Rising to an altitude of 4,322 metres, it stands as the second-highest peak in the Cascade Range and the fifth-highest in the state. Unlike many other peaks that are nestled within a range, Shasta stands in solitary magnificence, rising nearly 3,000 metres above the surrounding plains. The Summit Trail, primarily via the Avalanche Gulch route, is a legendary pilgrimage for mountaineers and high-altitude hikers, offering a gruelling 17.7 km round-trip journey that tests physical endurance, mental fortitude, and technical skill. This is a landscape of extremes, where ancient glaciers meet volcanic scree, and where the air thins to a crystalline clarity that reveals the curvature of the Earth.
- Distance: 17.7 km return
- Elevation Gain: 2,200 m
- Duration: 1–2 days (2 days recommended for acclimatisation)
- Difficulty: Very Challenging (requires ice axe and crampon skills)
- Best Time: Late June to mid-September (dependent on snowpack)
- Highest Point: 4,322 m (Summit)
- Trailhead: Bunny Flat (2,103 m)
- Permits: Wilderness Permit and Summit Pass required
Overview
The ascent of Mount Shasta via Avalanche Gulch is often described as one of the most rewarding non-technical climbs in North America, though the term "non-technical" can be deceptive. While it does not require vertical rock climbing or complex rope work in standard summer conditions, it demands a high level of fitness and the ability to safely navigate steep snow slopes using an ice axe and crampons. The route begins at the Bunny Flat trailhead, winding through subalpine forests of red fir before emerging into the stark, high-desert volcanic landscape that defines the upper reaches of the mountain. The sheer scale of the ascent—gaining 2,200 metres in less than 9 kilometres—is a relentless physical challenge that few other trails on the continent can match.
The journey is a masterclass in geological transition. From the lush meadows of Horse Camp to the stark, wind-scoured moraines of Helen Lake, walkers witness the raw power of volcanic activity and glacial erosion. The upper mountain is dominated by the "Red Banks," a series of dramatic volcanic towers that glow with a deep ochre hue in the morning light, and "Misery Hill," a deceptively long slog that tests the resolve of even the most seasoned climbers. Reaching the summit is an experience of profound isolation and beauty; on a clear day, the views extend from the grey volcanic cones of Lassen Peak to the south, all the way to the emerald forests of Southern Oregon to the north.
Success on Shasta is never guaranteed. The mountain creates its own weather systems, and lenticular clouds—often mistaken for UFOs by local mystics—can form over the summit in minutes, signalling the arrival of high-velocity winds and plummeting temperatures. This is a peak that demands respect, meticulous planning, and a deep understanding of one's own physical limits. For those who stand upon its pinnacle, the reward is a sense of accomplishment that lingers long after the descent into the warmth of the California valley below.
History and Cultural Context
Mount Shasta holds a place of deep reverence in the cultural fabric of the region. For the indigenous peoples of the area—including the Wintu, Achumawi, Atsugewi, Modoc, and Shasta tribes—the mountain is a sacred site, often viewed as the centre of creation or the home of the Great Spirit, Skell. Many tribal traditions hold that the mountain is too sacred to be climbed to the very top, and it remains a site for contemporary spiritual ceremonies and offerings. The name "Shasta" itself is believed to be derived from the name of the indigenous people who lived in the surrounding valleys, though its exact etymology remains a subject of linguistic debate.
The geological history of the mountain is equally fascinating. Shasta is a "composite" volcano, built up by four overlapping volcanic cones that have erupted over the last 590,000 years. The most recent significant eruption is thought to have occurred in 1786, witnessed from the sea by the explorer La Pérouse, though this remains a point of scientific discussion. The mountain's massive bulk is composed of layers of andesite and dacite lava, interspersed with volcanic ash and mudflows (lahars), creating the complex and often unstable terrain that climbers must navigate today.
European exploration of the peak began in earnest in the mid-19th century. The first recorded ascent was made in 1854 by Elias Pearce and a party of eight others, who used a series of wooden ladders to bypass difficult sections. In the late 1800s, the legendary naturalist John Muir famously survived a harrowing night on the summit during a blizzard by huddling near the geothermal fumaroles (hot springs) to stay warm. Muir’s writings helped cement Shasta’s reputation as a place of sublime natural beauty, leading to its eventual protection within the Shasta-Trinity National Forest. Today, the mountain continues to attract a diverse array of visitors, from serious mountaineers to those drawn by the numerous "New Age" legends that suggest the mountain hides a secret city, Telos, beneath its slopes.
Want more background? Read extended notes on history and cultural context → Learn more
Seasonal Highlights and Weather Reality
The climbing season on Mount Shasta is dictated entirely by the snowpack. Unlike many other peaks, Shasta is often easier to climb when there is a significant amount of snow, as this covers the loose, unstable volcanic scree that makes summer hiking a "two steps forward, one step back" ordeal. The primary climbing window for Avalanche Gulch is typically from late May through mid-July. During this period, the snow is usually firm enough for efficient cramponing in the early morning but soft enough for a controlled descent (glissading) in the afternoon.
Spring (April to June): This is the prime season for ski mountaineering and those seeking a pure snow ascent. The weather is volatile, and avalanche risk is a primary concern. However, the "climbing skin" of the mountain is at its best, and the Red Banks are usually well-covered, allowing for multiple route options through the chimneys.
Summer (July to September): As the snow melts, the route transforms. By August, Avalanche Gulch often becomes a "scree slog," which is physically exhausting and increases the risk of rockfall. This is the best time for those who prefer hiking on solid ground, but a helmet becomes even more critical as the melting snow releases rocks from the cliffs above. The weather is generally more stable, but afternoon thunderstorms are a frequent hazard.
Autumn and Winter (October to March): These months are reserved for expert mountaineers with advanced winter survival skills. The mountain is battered by Pacific storms, and temperatures on the summit can drop to -30°C with wind chills far lower. The route is often a mix of blue ice and deep, unstable powder, making it a formidable and dangerous undertaking.
Regardless of the season, the "Shasta Weather" is a factor that must be monitored hourly. The mountain's height and isolation mean it intercepts moisture-laden air from the Pacific, creating sudden whiteouts and high winds. Always check the Mount Shasta Avalanche Centre forecast, even in summer, as they provide the most accurate mountain-specific weather data.
Recommended Itinerary

2-Day Mount Shasta Summit Itinerary
Day 1: Bunny Flat to Helen Lake (High Camp)
- Distance: 5.6 km
- Elevation Gain: 1,067 m
- Time: 3–5 hours
- Start at Bunny Flat Trailhead (2,103 m). Ensure your Summit Pass is displayed and you have your WAG bag.
- Follow the well-defined trail to Horse Camp (2,407 m). This is a great place to fill water at the spring and visit the historic Sierra Club stone hut.
- Continue upward through "Olberman’s Causeway," a beautifully constructed rock path.
- The trail becomes steeper and less defined as you enter the lower reaches of Avalanche Gulch.
- Arrive at Helen Lake (3,170 m). Note: Helen Lake is a flat glacial bench, not an actual lake (it is usually frozen or snow-covered).
- Set up camp, melt snow for water, and focus on hydration and rest. This early arrival allows your body to begin acclimatising to the 3,000 m+ altitude.
Day 2: The Summit Push and Descent
- Distance: 6.5 km (return to Helen Lake) + 5.6 km (return to Bunny Flat)
- Elevation Gain: 1,152 m (to summit)
- Time: 6–9 hours for the ascent, 3–5 hours for the descent
- Alpine Start: Begin climbing between 2:00 AM and 4:00 AM. The goal is to reach the summit and begin your descent before the sun softens the snow too much.
- Climb the "Heart" of Avalanche Gulch, a steep snow slope (up to 35–40 degrees). Use crampons and ice axe.
- Navigate the Red Banks (3,900 m). Choose one of the "chimneys" (narrow snow chutes) to pass through these volcanic towers. This is the steepest part of the climb.
- Emerging above the Red Banks, you reach the base of Misery Hill. This is a long, 300-metre slog on loose volcanic ash or snow.
- Cross the relatively flat Summit Plateau. Pass the steaming fumaroles (sulphur vents)—do not linger here as the fumes can be toxic.
- Final scramble up the Summit Pinnacle (4,322 m). The true summit is a small rock outcropping with a brass survey marker.
- Descent: Carefully down-climb the Red Banks. If snow conditions allow, glissading (sliding on your buttocks using your ice axe as a brake) from the base of the Red Banks to Helen Lake can save hours of effort.
- Pack up camp at Helen Lake and complete the final descent to Bunny Flat.
Important Notes:
- The 2-day itinerary is strongly recommended to reduce the risk of Acute Mountain Sickness (AMS).
- Water is only available at Horse Camp (spring) or by melting snow at Helen Lake.
- Turn-around time: If you have not reached the summit by 11:00 AM, it is generally advised to turn back to avoid soft snow and afternoon storms.
- Always travel in a group or ensure someone knows your specific timeline.
Planning and Bookings
Book Your Trip
Everything you need to plan your journey
Accommodation
Find places to stay near Mount Shasta
Flights
Search flights to Mount Shasta
Essential Preparation
Mount Shasta is a serious undertaking that requires significant physical preparation. You should be in excellent cardiovascular shape, with experience hiking long distances with a heavy pack. Training should include weighted hill climbs and stair workouts. Acclimatisation is the most common reason for failure; if possible, spend a night at Bunny Flat or in the town of Mount Shasta (1,100 m) before starting your climb.
The town of Mount Shasta serves as the primary base. It offers several specialised mountaineering shops where you can rent boots, crampons, ice axes, and helmets. It is highly recommended to check in with the US Forest Service Ranger Station in town for the latest conditions and safety briefings. Logistics are relatively simple as the trailhead at Bunny Flat is accessible via a paved road, though it can be crowded on summer weekends.
Trail Accommodation
There are no indoor accommodations or huts on the Mount Shasta Summit Trail. This is a wilderness experience requiring self-sufficiency.
Camping Options:
- Horse Camp (2,407 m): Managed by the Sierra Club. There is a stone hut (for emergency use only), a seasonal spring with fresh water, and composting toilets. Camping is allowed on the surrounding benches for a small fee (paid via an iron ranger). This is a lower, more sheltered option.
- Helen Lake (3,170 m): The most popular high camp. It is a flat, exposed bench. There are no facilities here—no water (must melt snow) and no toilets. You must use WAG bags for all human waste. It is very windy and can be extremely cold.
- Bunny Flat (2,103 m): Car camping is permitted in the parking area, which is a good way to start your acclimatisation process the night before your hike.
Booking Requirements:
- No reservations are required for camping at Helen Lake or Horse Camp.
- Wilderness permits are self-issue at the trailhead and are free.
- Summit Passes ($25) are required for anyone climbing above 3,000 m and can be purchased at the trailhead or at local gear shops.
Required Gear
- Mountaineering Boots: Stiff-soled boots compatible with crampons. Regular hiking boots are often too flexible for safe crampon use on steep snow.
- Crampons: Steel crampons are essential for the firm morning snow. Ensure they are properly fitted to your boots before leaving the trailhead.
- Ice Axe: A standard mountaineering axe for self-arrest and stability. Know how to use it before you need it.
- Climbing Helmet: Non-negotiable. Rockfall is a significant hazard in Avalanche Gulch, especially as the day warms up.
- Navigation: A GPS with offline maps, a compass, and a physical map of the Mount Shasta Wilderness.
- Backpack: 50–65L for a 2-day trip, with straps to secure your ice axe and crampons.
- Headlamp: High-lumen output with spare batteries for the midnight "alpine start."
What to Bring
- Water and Treatment: Carry at least 3–4 litres for the summit push. At Helen Lake, you will need a stove and plenty of fuel to melt snow for water.
- High-Calorie Food: Focus on easily digestible carbohydrates. Energy gels, nuts, dried fruit, and "summit treats" to keep morale high.
- Clothing Layers: A moisture-wicking base layer, an insulating mid-layer (fleece or down), and a waterproof/windproof shell. Do not wear cotton.
- Sun Protection: High-altitude sun is intense. Use SPF 50+ sunscreen, lip balm with SPF, and Category 4 glacier glasses to prevent snow blindness.
- WAG Bags: (Waste Alleviation and Gelling). You are required to pack out all human waste. These are provided for free at the Bunny Flat trailhead.
- First Aid Kit: Include blister care, ibuprofen (for altitude headaches), and any personal medications.
- Emergency Shelter: A lightweight bivy sack or space blanket, even if you plan to return to your tent.
Permits
Securing the necessary paperwork for Mount Shasta is straightforward compared to many other major peaks, as there is currently no quota system for the Avalanche Gulch route. However, compliance is strictly enforced by climbing rangers.
Summit Pass: Anyone planning to climb above 3,000 metres (which includes the summit) must purchase a Summit Pass. As of 2024, the cost is US$25 per person. The pass is valid for three days from the date of purchase. You can buy these at the Bunny Flat trailhead using an "iron ranger" (cash only, exact change required) or at the Mount Shasta Ranger Station and local outdoor stores in town using a credit card.
Wilderness Permit: A free Wilderness Permit is required for all entry into the Mount Shasta Wilderness, whether you are summiting or just hiking to Horse Camp. These are self-issue at the trailhead. You must keep one copy with you and deposit the other in the collection box.
Parking: A Northwest Forest Pass or a digital day-use fee is required for parking at Bunny Flat. These can be purchased online or at the trailhead. During the peak summer season, the parking lot fills up very early; arriving before 6:00 AM is recommended for Day 1.
Group Size: The maximum group size in the Mount Shasta Wilderness is 10 people. This is to minimise impact on the fragile alpine environment and to manage safety in the narrow chutes of the Red Banks.
Other Activities in the Area
The region surrounding Mount Shasta is a playground for outdoor enthusiasts. If you have extra time or if the weather prevents a summit attempt, consider these alternatives:
- McCloud Falls: A series of three spectacular waterfalls (Lower, Middle, and Upper) on the McCloud River. A gentle 6 km trail connects all three, offering great swimming holes in the summer.
- Castle Crags State Park: Located just south of Dunsmuir, these dramatic 6,000-foot granite spires offer world-class hiking and rock climbing with incredible views back toward Mount Shasta.
- Lake Siskiyou: A beautiful reservoir at the base of the mountain. It features a 11 km perimeter trail, kayak rentals, and some of the best "mirror" views of Shasta's reflection.
- Pluto’s Cave: A massive, ancient lava tube north of the mountain. You can hike nearly a kilometre into the cave; it is a fascinating look at the volcanic plumbing of the region.
- Mossbrae Falls: A unique waterfall where springs burst directly out of a mossy canyon wall into the Sacramento River. (Note: Check current access status as the traditional route involves walking on active train tracks).
- Black Butte: The dark, conical dacite plug sitting right next to I-5. A steep 4 km trail leads to the top, providing a unique perspective on the massive scale of Shasta.
Safety and Conditions
Acute Mountain Sickness (AMS): At 4,322 metres, the air has significantly less oxygen than at sea level. Symptoms include headache, nausea, dizziness, and fatigue. The best treatment is descent. Do not ignore symptoms; AMS can progress to life-threatening HAPE or HACE. Hydrate aggressively and consider a slow ascent with an overnight stay at Helen Lake.
Rockfall: This is the most objective hazard in Avalanche Gulch. As the sun hits the cliffs of the Red Banks and Casaval Ridge, frozen rocks are released and tumble down the gulch. Always wear a helmet. Listen for the sound of "tumbling" and keep your eyes upward. Avoid climbing directly below other groups.
Weather Extremes: Mount Shasta creates its own weather. High winds (exceeding 100 km/h) are common on the summit ridge. If you see a "cap cloud" (lenticular) forming over the peak, it is a sign of high winds and deteriorating conditions. Turn back immediately. Hypothermia is a risk even in July if you are caught in a sudden storm without proper layers.
Glissading Safety: While glissading is a fast and fun way to descend, it is a leading cause of injury on Shasta. Never glissade while wearing crampons, as they can catch in the snow and cause broken legs or ankles. Always maintain control with your ice axe in the "ready" position for a self-arrest.
The Red Banks: The chimneys through the Red Banks are steep and can be icy. This is the most common place for slips. Ensure your crampons are secure and your ice axe technique is solid. If the snow is too hard, wait for it to soften or consider an alternative route if you are not confident in your front-pointing skills.
Side Trips and Points of Interest
The Sierra Club Foundation Hut (Horse Camp): Built in 1922 from local volcanic rock, this historic hut is a sanctuary for hikers. While you cannot sleep inside, the surrounding "Olberman’s Causeway" is a feat of trail engineering. The spring here provides the purest water on the mountain—cold, crisp, and refreshing.
The Red Banks: These are not just a navigational hurdle; they are a geological marvel. The vibrant red and orange hues of the volcanic ash and pumice contrast sharply against the white snow and blue sky. Passing through the "chimneys" feels like entering a high-altitude cathedral of stone.
Misery Hill: While the name suggests a grim experience, the top of Misery Hill offers the first view of the summit pinnacle and the vast Shasta Valley to the north. It is a psychological milestone; once you reach the top of the hill, the hard work is largely over.
The Summit Fumaroles: Just below the summit pinnacle, you will encounter several vents emitting sulphurous steam. These are a reminder that Shasta is an active volcano. While they provided warmth for John Muir in 1875, the gases can be nauseating. They are a fascinating, if smelly, highlight of the volcanic landscape.
Thumb Rock: A prominent volcanic spire on the ridge to the east of the Red Banks. It serves as a major navigational landmark for those climbing the Avalanche Gulch or Konwakiton Glacier routes.
Leave No Trace
The Mount Shasta Wilderness is a fragile high-alpine environment. Because of the high volume of climbers and the lack of soil to break down waste, traditional "cat holes" are not permitted. The "Pack-it-out" policy is mandatory and strictly enforced.
Your responsibility as a climber:
- Human Waste: You MUST use a WAG bag for all solid human waste. These are provided for free at the trailhead. Do not leave them on the mountain; pack them out to the specialised collection bins at Bunny Flat.
- Trash: Pack out every single item, including orange peels, nut shells, and micro-trash. If you find trash left by others, please pick it up.
- Water Protection: Do not use soap in the spring at Horse Camp. If you must wash, carry water 60 metres away from the source and use biodegradable soap.
- Campsite Selection: At Helen Lake, camp on established snow or rock sites. Do not move rocks or build new wind walls if possible; use existing ones.
- Wildlife: Do not feed the "camp robbers" (grey jays) or ground squirrels. It disrupts their natural foraging and makes them aggressive toward other hikers.
- Respect the Silence: Sound travels far in the thin air. Keep noise levels low, especially during the early morning hours when others are sleeping before their summit push.